Key Takeaways
PolyDock's modular system is designed to simplify dock configuration and future expansion.
Dock sections connect using purpose-built connection hardware.
Proper planning helps create a dock layout that fits the shoreline and intended use.
Dealers can assist with larger or more complex installations.
Whether you're designing a dock for a lakefront home, a marina, or a commercial waterfront, modular floating dock systems enable you to create layouts that perfectly match your shoreline, waterfront lifestyle, and evolving needs.
What Makes a Modular Floating Dock Different?
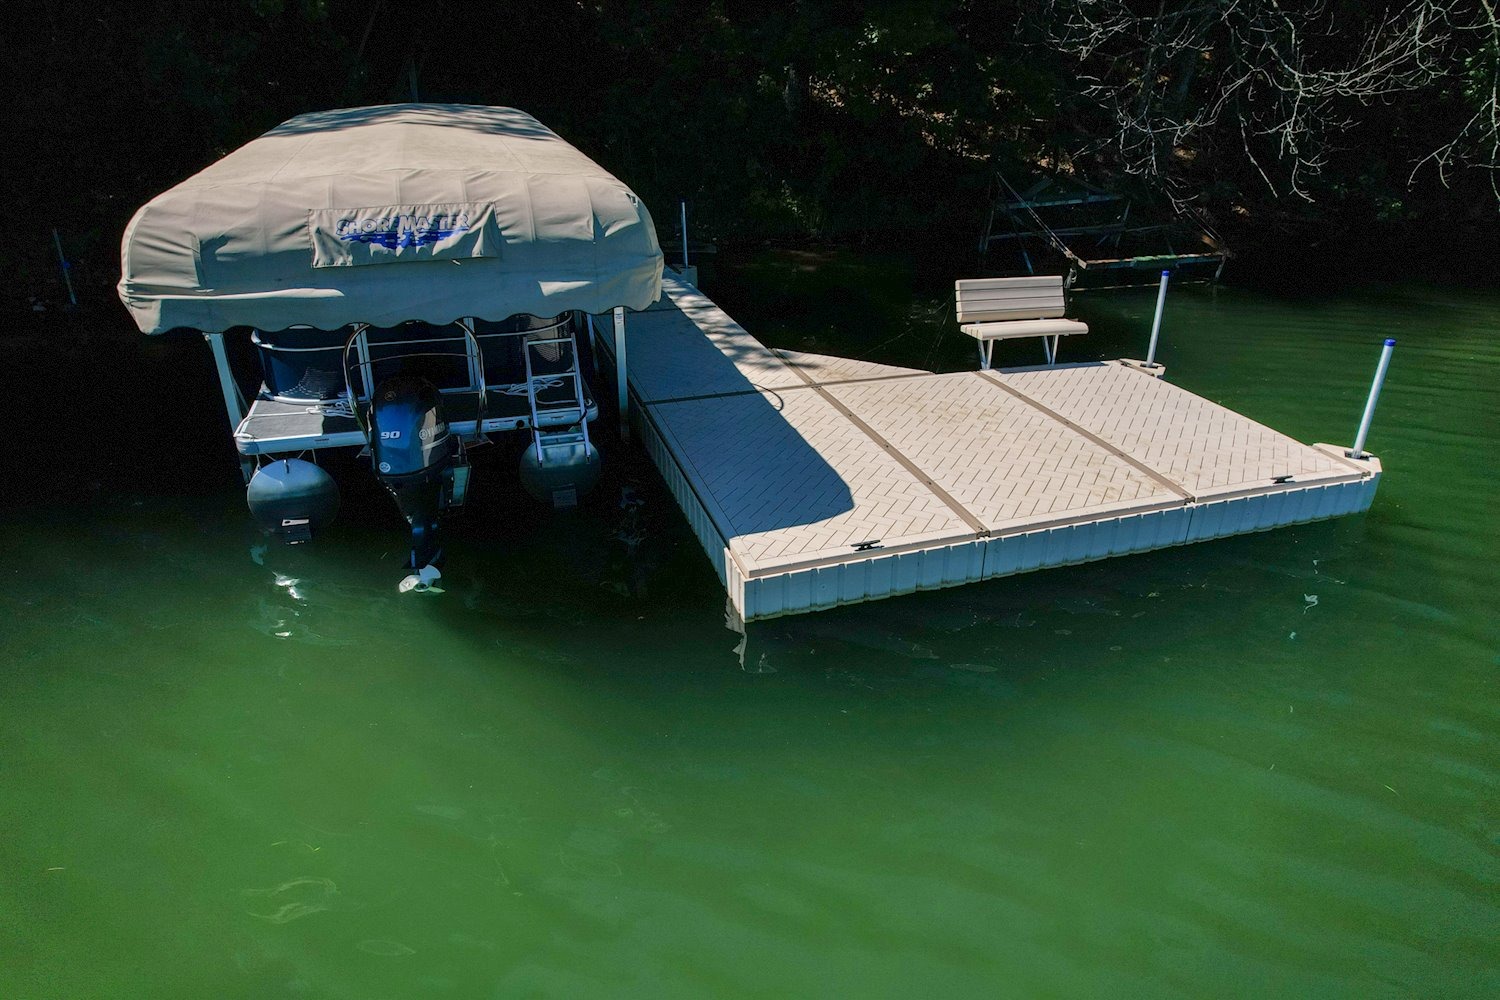
Modular floating dock systems are made up of interlocking sections that can be configured, reconfigured, or expanded to suit different shorelines and waterfront needs. Whether you're working with a curved, narrow, or irregularly shaped waterfront, dock sections of different sizes can be laid out to maximize usable space while accommodating changing water conditions and shoreline characteristics.
Perhaps more importantly, this design ethos gives owners the flexibility to expand or reconfigure layouts as their needs evolve. Unlike traditional fixed structures, you can start with a simple walkway for boat access and easily add sections for swim platforms, PWC launches, or more walking surfaces without requiring complex construction projects.
When winter arrives or harsh weather threatens, the modular design also makes storage highly manageable, as the relatively lightweight sections can be easily pulled from the water, disconnected, and stored.
Understanding PolyDock Connection Systems
PolyDock modular dock systems use specialized connector assemblies to securely join individual dock sections.
This connection system is comprised of the following components:
Connector Brackets: Top and bottom connector brackets mount into the channels along the perimeter of PolyDock sections, effectively clamping dock sections together (Brinson Marine, 2023).
Connector Rods: Steel connector rods pass through the brackets to lock neighboring sections together. Together, they provide strength across each section while allowing the dock system to flex naturally with waves, wind, and changing water levels.
Anchoring Brackets: These specialized brackets are used for mounting pipes, ramps, and other accessibility and anchoring accessories. They secure the structure in place while allowing the dock to glide up and down with water-level fluctuations.
Because every waterfront is different, dock anchoring systems may vary depending on dock size, environmental conditions, and local regulations. Larger installations, commercial applications, and complex layouts often benefit from guidance provided by an authorized PolyDock dealer to ensure the appropriate hardware and configuration are selected.
Planning Your Dock Layout Before Assembly
Before anything else, it’s very important that you check local regulations regarding waterfront structures. Many municipalities and environmental agencies set limits on dock size, placement, and anchoring methods to protect aquatic ecosystems and maintain access through navigable waters (Legal Clarity, 2025).
That said, here are some of the primary considerations when planning your dock layout:
Shoreline Slope: A steep, eroding, or high bank requires a longer gangway to span the gap safely. Conversely, a flat or gradual slope allows for a shorter gangway and easier access, often reducing the need for additional support structures.
Water Depth: PolyDock typically requires a minimum operating depth of 1.5 to 2 feet. If seasonal water levels drop below this, the dock will rest directly on the lakebed. The layout must extend far enough into deeper water so the dock remains clear of rocks and muck during dry seasons.
Boat Traffic: Ideally, the layout should protect moored vessels from prevailing wind and wakes. Leaving a boat sitting perpendicular to heavy boat traffic allows incoming waves to repeatedly smash the hull against the dock, putting immense stress on the entire system.
Intended Activities: Standard boat access walkways are typically 4 feet wide. However, if you plan to host guests for other recreational activities, we recommend using 6' x 8' or 5' x 10' sections to accommodate seating, tables, coolers, and other essential dock accessories.
Finally, if you plan to add a boat lift, PWC ports, or other equipment to your setup, make sure the layout’s centerline and anchoring system can handle the asymmetric weight and lateral forces of those future add-ons.
Want to see how PolyDock sections could fit your shoreline?
Basic Assembly Process Overview
While installation complexity varies depending on shoreline conditions and overall project size, the core PolyDock assembly process is highly intuitive. A standard residential configuration can typically be assembled and installed in a single afternoon by two adults with basic hand tools.
Assemble Connecting Brackets: Start by pre-assembling the PolyDock connector brackets. Note that the top brackets have small holes while the bottom brackets have larger holes. Run the connector rods through the holes in the bottom and fasten them using the hardware provided.
Pre-Install Anchoring Brackets: While on land, pre-install the required anchoring brackets for your setup. Make sure the brackets are properly fitted in their channels before tightening bolts alternately and evenly.
Position Dock Sections: Slip the pre-assembled connecting bracket over the fitted channel of the first dock section. Float the next section up, ensuring the channels on both dock sections line up perfectly. Once the top and bottom connector brackets are squarely clamping the ridges of both dock sections, tighten the hex bolts from above.
It’s easiest to connect the dock sections on the water. Plan your work, connecting sections furthest from the shore first. Once connected, push them out and work on additional sections. The last sections connected should be those nearest to the shore. If you can't work in the water, find a flat area with plenty of room. You can tow the docks into position later.
Common Installation Mistakes to Avoid
Over-Torqueing Connector Hardware: Exceeding the recommended 20 ft-lbs of torque can warp washers. The washer should sit flat on the deck surface. If the ends curl upward or sink deep into the plastic, it is over-tightened. This restricts the natural hinge-like flex the dock needs to handle waves.
Misaligning Bracket Channels: Connector rods must sit squarely inside the molded vertical channels of both adjacent docks. If they are crooked, the top and bottom connector brackets will clamp down unevenly, creating severe pressure points that can damage the connector assemblies under wave action.
Forgetting to Retighten Hardware: As the dock shifts, twists, and settles into the water over its first 48 hours, the connection points will naturally realign. You must return with a socket wrench within two days of installation to retorque the bolts back to 20 ft-lbs. Otherwise, loose connectors can slowly work their way out of the channels.
Overlooking Anchoring Requirements: Every floating dock requires an anchoring solution that accounts for local water conditions, seasonal water-level changes, and anticipated environmental forces. Without proper anchoring, the dock can twist, drift, or break apart under heavy winds, wakes, or current pressure.
When Should You Work With a PolyDock Dealer?
While many waterfront property owners love the DIY-friendliness of PolyDock, larger residential setups, commercial projects, and marinas benefit greatly from the expertise of authorized dealers. These waterfront experts bring specialized knowledge of site conditions, anchoring systems, and layout engineering, ensuring that your installation is not only safe but optimized for long‑term performance.
If you’re dealing with unique environmental challenges, such as irregular shorelines, steep drop-offs, or unpredictable currents, authorized dealers can recommend precise anchoring solutions and layout adjustments tailored to your site. This expertise ensures the dock remains secure against environmental forces while complying with local regulations and environmental protections.
Finally, dealers excel at executing highly customized layouts. Whether you need seamless integration with an existing seawall, a specialized transition ramp, or unique configurations to maximize waterfront space, an authorized PolyDock dealer can translate your vision into flawless installation.
Design a Dock That Grows With Your Waterfront
Every waterfront is different—and that’s exactly why PolyDock was created. Its modular design makes it easy to customize the perfect setup regardless of how you live, work, or play on the water.
Ready to build a dock system that can adapt to your evolving waterfront lifestyle? Enter your zip code at the bottom of this page to find a PolyDock dealer near you.
FAQs
How do PolyDock sections connect together?
PolyDock uses specialized connector assemblies composed of brackets and rods to clamp the outer edges of adjacent dock sections together. The system creates secure connections while allowing the dock to flex naturally with waves and wakes.
Can I add more dock sections later?
Absolutely. One of the biggest advantages of PolyDock's modular design is that owners can easily add sections as their needs change. Whether you’re expanding the footprint of a residential dock or adding slips to a marina, PolyDock makes it easy to expand or reconfigure dock layouts as lifestyles or business requirements evolve.
Is PolyDock difficult to assemble?
No, PolyDock is designed for a straightforward, intuitive DIY assembly process that most owners can handle with a helping hand. Standard residential configurations can typically be assembled and installed in a single afternoon by two adults with basic hand tools.
Do I need special tools to connect dock sections?
No, you do not need any highly specialized proprietary tools to connect PolyDock sections. The system is designed for simple assembly using standard household hand tools, such as 9/16" and 1/2" wrenches or sockets, screwdrivers, and a torque wrench.
Should I hire a dealer to install my floating dock?
For straightforward residential installations, some property owners may choose to assemble their dock themselves. However, larger residential systems, marinas, commercial projects, or docks installed on complex shorelines are often best handled by an authorized PolyDock dealer to help ensure proper layout, assembly, and long-term performance.
References:
Brinson Marine (February 25, 2023). Looking for Floating Dock? Why ShoreMaster Polydock might be the fit for you! https://www.youtube.com/watch?v=1D6s4oPm8zk&t=124s
Legal Clarity (Feb 11, 2025). Docks and Property Lines: What You Need to Know, https://legalclarity.org/docks-and-property-lines-what-you-need-to-know/


